Our Rainbow Paints Colour Advisory Experts have compiled some easy step by step instructions that you can follow to get your job done smoothly and efficiently:
Step 1: Select Your Colour Theme
Selecting a colour theme is essential in painting a room. Picking paint colours can get puzzling, but you don’t need to hire a decorator. Use these expert tips for choosing paint colours to turn your home into a sanctuary. A bedroom is one’s special place within your home. It depend whether you are creating an adventurous space for child’s room, a refreshing yet modern feel in the master suite or “Cosy Corner” for guests, the wall colour you choose is the key to setting just the right tone.
The Room size, wall height, architectural elements and light source are also important considerations when making your colour or design choices. We offer these tips to be considered:
- Control and Transform your room’s size with colour
To make a small room appear larger, paint it with soft and light shades. To make a large room feel more hospitable and trimmed down, we use warm or darker shades and more intense hues.
- Use the Colour Wheel to select the best colour.
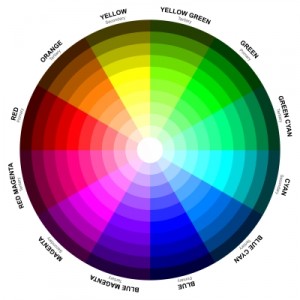
You will be amazed and dazzled how primary, secondary, and tertiary colours work together. Using the Colour wheel, you can create some of the best colour palette imaginable for your room.
- Become the colour scheme guru
There are three types of colour schemes: complementary, analogous, and neutral. Complementary schemes combine a primary and secondary colour from opposite sides of the colour wheel (red and green). Analogous colours are either warm (reds, oranges, and yellows) and cool (greens, blues, and violets). Neutrals are colours not included in a colour wheel, such as browns, whites, and blacks.
- Fashion a mood with colour

Colour affects mood and the way you perceive the ambience of a space. Cool colours are calming and warm colours energize a room. Pair a warm colour with a cooler complement to create energy.
- Harmonize paint with furniture and flooring
This is one of the most important aspects. Highlight a favourite painting or rug by letting it inspire your colour scheme. The trick is to choose a paint colour that blends with the piece instead of matching it exactly.
- Use neutrals as the ever eternal colour
Neutral colours blend in well with other colours. They are regard as the ever “seasoned” wall treatments. If you are selling your house, most prospective buyers have an easier time visualizing their furniture when looking at neutral walls.
We also offer a variety of online tools and resources to help you select the right look and colours for your home. They are available at our website (www.Rainbow-Paints.com) and are completely FREE. Try them to your heart’s content to get the perfect combination for your home:
Rainbow Paints Colour Visualizer
Rainbow Paint Colour Calculator
Colour My World- A Painting Guide by Rainbow Paints

Step 2: Choose the Right Type Paint
It is important to choose the correct type of paint for the correct environment. Rainbow Paints is available in Water based Emulsion, Water Based Matt, Oil based enamels to name some. It all depends what type of finish you are looking for and what area you are painting. Any finish (sheen) can be appropriate for a bedroom, like Flat finish, Egg shell, Satin and high gloss finish.
Our Rainbow Plastic Emulsion, Rainbow Vinyl Emulsion and even our Rainbow Weather Guard come in the exquisite range of Flat Finishes. Although each products final finish is slightly different from one another. Plastic Emulsion gives Matt with Silky finish, which is formulated for most masonry, brick and cement work. It can also be applied on hardboard and chipboards. Vinyl Emulsion also provides a Matt with silky finish while Weather Guard provides very high washablity because of being highly weather resistant.
Flat, matte finishes are perfect for elegant rooms, like a master suite or guest bedroom. These gentle, soothing finishes conceal flaws and thus are an excellent choice for older walls. You may also want a matte finish if your room is awash in sunlight, to avoid reflection and shine.
Rainbow Matt Finish Enamel provides an excellent eggshell finish is often used for decorative finishes because it provides a low luster. It cleans up better than a flat finish, but probably not as well as you would want in a kitchen or bathroom. Rainbow Silky Smooth Matt Emulsion provides a mesmerizing Satin finish which is the most popular paint sheen. This finish is a good choice for woodwork, walls, doors, and hallways. It’s also great for bedrooms and dining rooms. Satin finish is highly washable but it is not scrubable. Satin and Eggshell finishes are best in moderate-traffic areas, like a child’s room. Clean-up is easy, typically requiring only a damp cloth.
Rainbow Super Gloss Enamel is our product that provides a high gloss finish. Gloss finish is ideal for detailed woodwork and wainscoting (wall panels that typically end at a chair rail or at eye-level height). The sparkle it produces creates a pleasing contrast against your matte or satin finish walls.
Check out what our experts at Rainbow Paints suggest that you should use in the table below:
| Gloss Guide | ||||
| Traffic | Areas | Gloss | Features | Products |
| Low | master bedrooms & ceilings | flat | warm, absorbing, hides well | Rainbow Plastic, Vinyl, Silky Emulsion |
| Moderate | living, family rooms, halls, bedrooms | eggshell | washable, resists marking | Rainbow Matt Finish Enamel |
| Medium | kitchens, kids rooms & woodwork | semi gloss | withstands scuffing, moderate shine | Rainbow Synthetic Enamel |
| High | furniture, trim & metal | high gloss | cool, bright, “wet look”, tough, durable | Rainbow Super Gloss Enamel |
Step 3: Estimating the Quantity of Paint & Planning

As stated before in this guide, we ask you to review our Colour Visualizer and get familiar with our Paint Calculator. We have tried to make them as easy as possible but if you don’t get how to use it we welcome you to call us at Rainbow Colour Advisory Services for all your FREE painting advise.
It is essential to estimate how much paint to buy, whether you are painting an entire room or a single wall. Estimating paint depends on the amount of wall you want to cover and how coarse the wall is. Make sure that you have the right amount of paint because the only way to ensure your colour stays consistent is to purchase all your paint at the same time.
Be very careful at this stage since if you buy too much paint, especially our highly Computerized Customized and tailored paint from 1050 Colour shades, you cannot return it since it will be made especially for your need. It is vital that you also take into account the wastage of paint, Although our colour calculator give very precise paint quantity but due to different application scheme it is always a good practice that you add 10% – 20% as wastage. It means if your total paint quantity comes out to be 10 Litres than 20% wastage of that will be 2 Litres, making the safe side of the grand total to be 12 Litre.

.
Step 4: Clear the Room & Select the Right Tools
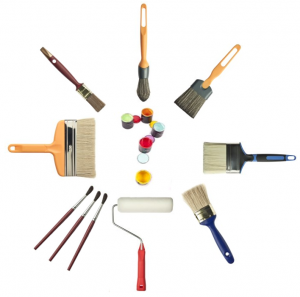
Although Painting tools come in various shapes and sizes; however, you only really need the following tools for a basic paint project. If you decide that you plan to do a lot of painting, you can start to look at specialty tools.
- Painter’s tape (Both Narrow and Wide): They help protect painted and finished trim and help you achieve professional paint lines.
- Cover or wrapping cloth or plastic: Essential to protect your furniture and floors.
- Emery paper or Sand Paper of medium and fine grit: They eliminate imperfections from walls.
- Trisodium phosphate (TSP) or a substitute: TSP Cleanses without leaving residue.
- 1″ and 2″ angled sash brush: Great for cutting in corners and painting edges
- Paintbrushes of 3″, 4–5″: Best for painting flat surfaces
- Spare buckets, cans and jars: For paint mixing etc
- A painter’s hat, goggles, dust masks: For your protection.
- Appropriate chemical resistant gloves.
- Paint tray and disposable liners: The liner eliminates cleanup
- 9-inch roller, screw-on extension pole, and roller cover: Essential for coating walls and ceilings.
- Newspapers, Putty knife, Wide-blade scraper, Edge pads, Sponge mop and mopping brooms
- Sand sponge for trim and moulding.
Now that we have the proper tools, you can start clearing and cleaning the room. Here are a few things that you should do:
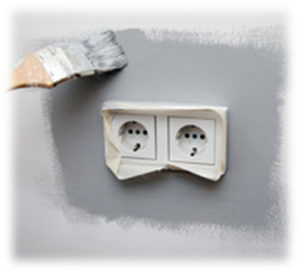
- Move the furniture. Use good lifting techniques, such as bending at the knees and not the back, this will ensure you don’t get sidelined before the project actually gets underway.
- Move all heavy furniture from the wall to the Room Centre, where they can be protected with drop cloths.
- Remove small furnishings from the room.
- Take off electrical outlet covers, keeping all screws and fasteners together in a zipped plastic bag for easy replacement.
- Tape all electrical, cable TV and telephone fixtures with painter’s tape and also tape a small plastic bag around door knobs.
How to Paint: Checklist

Tick Box
| CheckList ✓ | |
| Preparation | |
| Painters / Masking tape | |
| Drop cloth ( Fabric or Plastic) | |
| Paint scraper | |
| Paint stripper | |
| Sandpaper and Emery paper | |
| Sanding block | |
| Orbital Sander or angle grinder | |
| Coloured caulk | |
| Gap filler | |
| Putty and filling knives | |
| Safety | |
| Goggles | |
| Gloves | |
| Dust mask | |
| Application | |
| Selected Rainbow Paint Product | |
| Paint pot | |
| Paint stirrer | |
| Paint brush ( 3″, 4″, 5″ ) | |
| Edging tool | |
| Paint pad | |
| Roller frame & cover | |
| Spray gun (If required) | |
| oller tray | |
| Roller extension handle | |
| Ladder – step or extension | |
| Rainbow Paints Primer | |
| Rainbow Undercoat (if required) | |
| Clean Up | |
| Mineral turpentine | |
| Rags / Newspaper / Wool | |
| TSP (Trisodium Phosphate) | |

Step 5: Protect the Floors and Woodwork
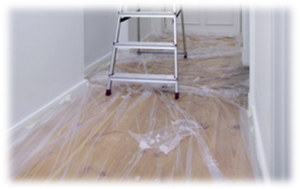
Painting needs to be a tedious work from the start. You need to protect and cover all of the items in the room to become the master painter. Here are some ways you can safeguard them:
Floors
Cover the floors completely with drop cloths. Try to lay the drop cloths as close as you can to the baseboards. We recommend you use cloth drop cloths because plastic doesn’t absorb paint; a spill on plastic can create a slippery situation and quite a mess, too. If you do choose to use plastic, cover it with newspaper.
Woodwork / Windows
Tape along the top edge of the baseboards using a quality painter’s tape with at least a 2″ width (look for products that contain specific properties to handle your unique job or surface). 
You should also tape any door or window frames or mouldings that are not going to be painted.
Tip: By taping your baseboards and other framing, you make “cutting in” faster and easier. We recommend painter’s tape because masking tape dries out too quickly and becomes difficult to remove. Once you have applied the painter’s tape to the baseboard, pass over it with a putty knife, or a plastic card, to smooth out any bubbles and ensure adhesion. This will keep any paint from getting underneath the tape. Remove the tape while the paint is still wet.
Step 6: Prepping Trim and Special Surfaces Difficult Surfaces
First use a hand vacuum with a brush attachment to clean dust and debris off woodwork and doorframes. This is important as it will avoid numerous painting problems such as bittiness.
Walls:
Proper preparation is critical when painting Walls—the touch-ups you do here will create the smooth surface you seek once it is painted.
- Fill in dents and rebuild chipped corners with Rainbow Wall Putty
- Use patching compound on scratches and smaller cracks
- Sand the dry surface with 180-grit paper and wipe away the dust
- Use a hand vacuum with a brush attachment to clean dust and debris from woodwork and door frames
- In case it a bare surface, it is essential to prime it using “Rainbow Perfecton Wall Primer Sealer” or “Rainbow Water Based Primer“.
Woodwork:
In Eggshell and Gloss finishes, every imperfection shows through, proper preparation is essential when painting woodwork. Fill in dents and rebuild chipped corners with wood filler.
Step 7 – Application Guide
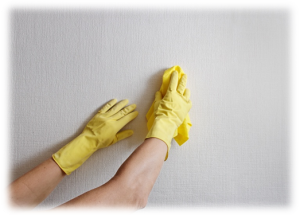
In this step you must follow the product specified application guide since Plastic Emulsion, Matt Finish Enamel, Silky Smooth Matt Emulsion, Rainbow Matt Emulsion, Super Gloss Enamel etc all have slightly different application. Please check the “Preparation of Surfaces section“ for interior, exterior, metallic and wooden structure.
A: Cleaning and Drying the Surface
Cleaning the area to be painted is one of the most crucial stages in painting since the finishing of the paint depends on it. Due to improper application of this step more than 90% of painting problem occurs. Using an ordinary sponge mop clean the ceiling and walls thoroughly, use TSP (Trisodium Phosphate) and water according to the specification of the Rainbow Paints Product given on the back of the paint bucket. Rinse the walls well and let them dry.
Carefully remove the dust and dirt from the room as particles can get in the paint or on the painting tools like rollers and brush and can create major painting problems like bitty film making the paint finish look disastrous.
B: Fill Cracks and Holes
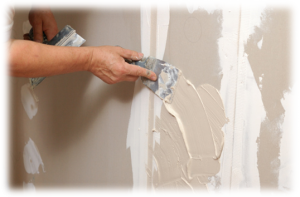
- Old / Painted Surfaces:
Sand Down the whole area with Emery paper which will remove all the loose paint film. Then Dust off and apply in thin layer, 2 coats of Rainbow Wall Putty should be applied for better finish using a putty knife; cover a little past the edges. Use the putty knife to smooth your surface. Leave it to dry thoroughly. If more smoothening is desired, sand with fine grit emery/sand paper. Repeat these steps, leaving each layer to dry until you have achieved a perfectly smooth surface. For large areas, traditional drywall patching techniques are recommended.
It will be necessary to prime over the Wall putty prepared surface. Make sure the compound is fully dry before priming.
- New Surface:
Rainbow Wall Putty is ready for use however slight addition of water is recommended for excessive absorbent plasters. Two coats of putty are applied, with an interval of 2-3 hours between coats. Use a putty knife; cover a little past the edges. Use the putty knife to smooth your surface. Sand down the surface with Emery Paper/ Sand Paper to a smoothened surface. Leave it to dry thoroughly. If more smoothening is desired, sand with fine grit emery/sand paper. Repeat these steps, leaving each layer to dry until you have achieved a perfectly smooth surface. For large areas, traditional drywall patching techniques are recommended.
It will be necessary to prime over the Wall Putty prepared surface. Make sure the compound is fully dry before priming.
C: Priming of the Walls
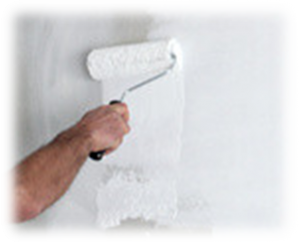
One of the more important but usually forgotten steps is “priming of the walls“. It is essential to achieve a professional looking result and finish of your room. Primer is an undercoat that protects the walls, it ensures better bonding of paint to the surface, and more over it increases paint durability and strength, and provide additional protection for the material being painted. Wood, Walls, and plaster all require primer to seal the surface. With proper priming, the quantity of topcoat used will also be less and the final colour will lay rich on the top layer; giving it a more protective and long lasting finishing.
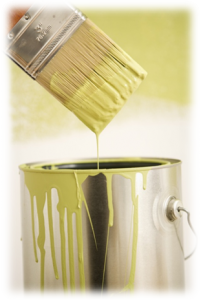
Never dip a brush more than about 1/2 the length of the bristles into the paint. If you do, the brush will become next to impossible to clean.
Different Primers exists for different purposes, like our “Rainbow Perfecton Wall Primer Sealer” which is an oil based, Alkali resisting sealer just “perfect” to be used on wood, chipboard, steel and masonry structures. We call it our all-rounder product.
“Rainbow Water based Wall Primer” is a relatively newer product in the Pakistani market and can also be used for sealing purposes.
“Rainbow Red oxide Primer” is a perfect base for steel and wood to improve the adhesion of finish paint to substrate, more suitable to be used on steel fabrication, machinery, storage tanks which are to be left without finishing coat for some time. While “Rainbow Universal Undercoat” is a multipurpose undercoat which can safely be used under Nitrocellulose finishing. It is specially formulated for M.S., Wood and can be used as filling putty on chipboard used for furniture.
Step 8 – Painting
A: Trim Area
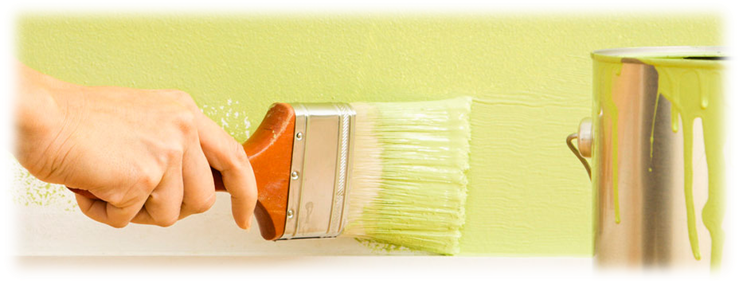
Professional painters recommend painting the trim work before painting the walls. Beginning with your baseboards while using a 2″ angled tip/sash brush and paint around the room in one direction, so that you do not miss any areas. Next, paint the window trim, door trim and any moulding. Remove tape before the paint dries.
B: Cutting In
“Cutting in” is a method that assists you achieving clean lines at the corners and edges. It is achieved using an angled 2″ trim brush; we make a series of short strokes away from the edges where the walls or ceiling and wall meet. Work in three-foot sections so you maintain a wet edge.
C: Walls and Ceilings
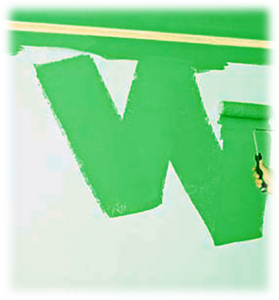
After all “Cutting In” work has been completed, we move towards the ceiling of a room. Both Rollers and Brushes are used for this purpose, brushes being the more popular medium by Pakistani Painters. The standard way of painting a ceiling is to use a roller on an extension pole and glide the paint in single direction, moving quickly to maintain your wet edge. For a proper finish you must avoid excessive pressure. Roll a shape of a “W” or “M” on the wall to distribute the volume of the paint. Then use overlapping vertical strokes to spread paint uniformly between the lines. Move vertically across the room, moving from side to side. Overlap a bit of the cut-in edges to blend away any visible brush marks. In similar fashion complete painting the entire wall, after which you have to leave it to dry.
Be very careful at this stage and remember not to put anything near the walls until the paint is completely dry. Recoat as per instruction of the paint bucket since different type of paint requires different coats of paint for proper finish and coverage. Rainbow Plastic Emulsion / Vinyl / Silky or usually water based paints requires usually 2-3 coats, while Matt/ oil based require 2 coats of paint.
Step 9 – Winding up your work
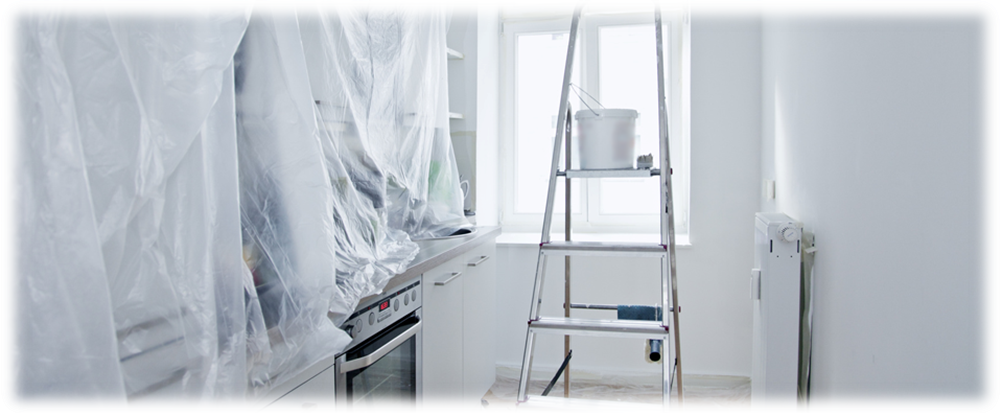
Now after painting, it is essential that you carefully seal any unused or remaining paint for storage, since it is always great to have some for small touch ups. Properly dispose any wastage according to their disposal routine. Remove the floor covering cloth or plastic after the paint has completely dried and replace the electrical covers.
Professional interior designer and decorator usually advise you to carry the colour scheme to the minute details since this create the theme and mood you were aspiring since the beginning of this painting guide. You can use the colour wheel to create contrasting or complimenting tone for all your colour tone of your wall. We have even made a Rainbow Colour Guide- “Colour My World” to assist you in colour tone selection.
Step 10 – Let's Clean Up & Green Up

Rainbow Paints is an environment friendly company and we take great pride in doing our bit for the protection of the environment. Our Green-Up Campaign is to promote and create awareness amongst consumers about use of environmental friendly paints, painting methods and their proper disposal.
Even if you have more painting to do tomorrow or the day after that with the same colour and you don’t want to clean your brushes and rollers when you take a break; we suggest that you wrap them in a sealed plastic bag to let them stay moist until you are ready to paint again. This practice not only saves water, as you do not wash the brush, but also saves your precious time which you would have lost to wash it repeatedly.
Quality tools will last for years if properly cleaned and stored.
- Clean painting tools and equipment:
- Latex or Water Based Paints – Clean brushes, roller and tray using soap and warm water.
- Oil based or Alkyd Paints – Use the right thinner and remove thinner residue from tools with warm soapy water.
- Disposal of paint:
Although it’s always nice to have extra paint for touch-up but even then if do not want to store it, pass it to a friend or donate it to some welfare organization. If you ca not give it away, check with your local community for their disposal suggestion. If you have a little left over, you can get rid of it by painting it onto cardboard then throwing out the dried cardboard instead of disposing of the liquid. Rags, paint buckets, newspaper should be left to dry before disposal. We suggest that you offer them to your local recycling centre.
Tip: Note down the product name and Colour code for future reference and correct matching. Label each can by room, in case it is require for touch-ups or repainting. Ensure that can lid is closed securely, if you are keep paint in storage.


